In this post I would speak more in the direction of the « right » exposure. I use the word « right » because by choosing our settings we want to achieve a result in purpose. This is where your light-meter and the metering modes become important.
In order to make it easier to understand I would take the example of a subject in back light. I really like pictures with back light. When I started to play with my DLSR I was always amazed by such pictures where the sun is in the back of the subject and you can still recognize the subject. Most of my pictures were at the beginning a beautiful blue sky and a really really dark gray subject. I am sure you know these pictures. Of curse, it can also be great to just detach the silhouette of your subject and see a beautiful black shadow on a beautiful blue sky.
To achieve such extreme results, the understanding of metering modes and light-meter is really helpful.
There are 4 metering modes:
– Evaluative metering (point with 2 semicircles around): the brightness is metered on all the picture. It is the basic mode of metering.
– Partial metering (2 semicircles): the brightness is metered in the center plus a small peripheral zone of the center. Really helpful with backlit subjects.
– Spot metering (point): the brightness is metered in the center of the picture (more selective than the partial metering mode).
– Center-weighted average metering (nothing): the brightness is metered on all the picture but the center zone has more influence than the peripheral zone. It like an hybrid between the evaluative and the partial metering.
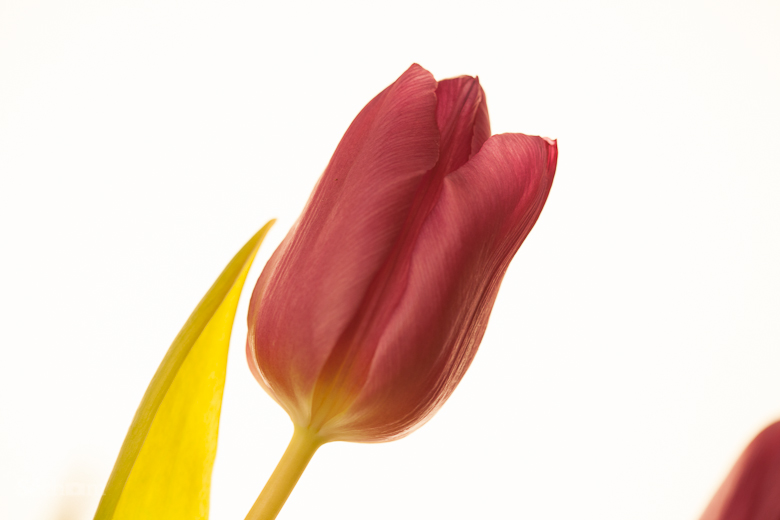
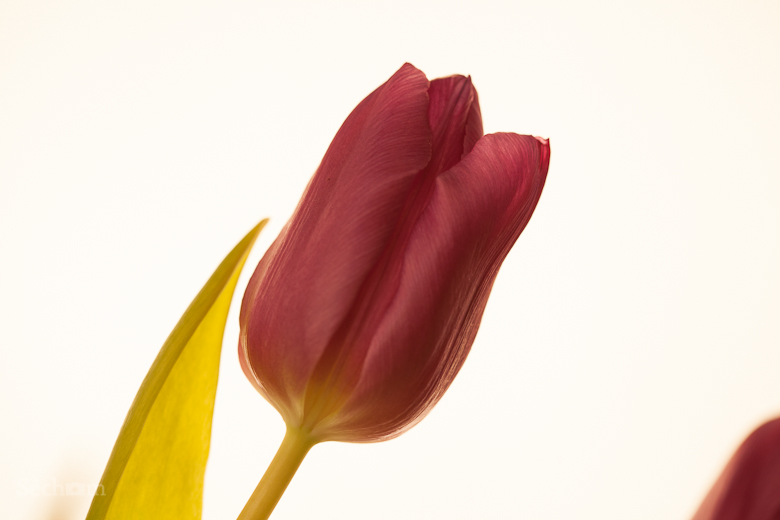
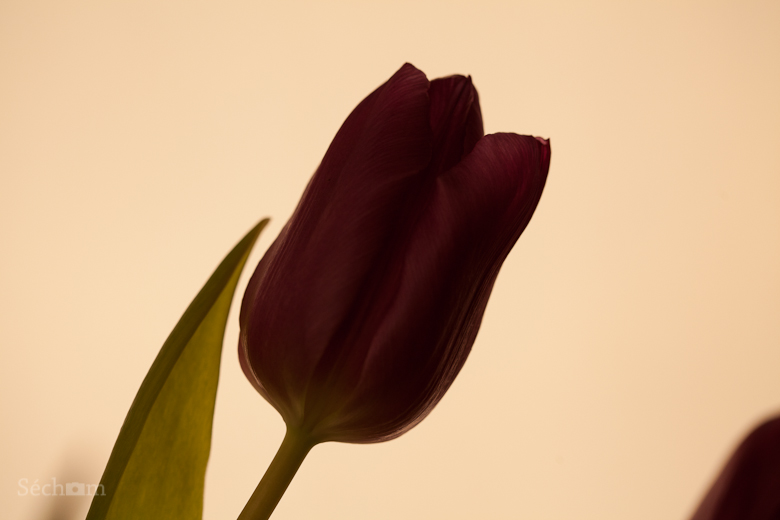
I know that such theory is not really speaking that is why I want to show you now some small pictures. As I live in the Netherlands I chose a tulip as subject. I put it in front of a light to simulate the back light configuration. I had also another light to enhance a little bit the color of the flower. I was using my 100mm 2.8 lens, put the camera in the Av-mode to f4.0 and 400iso. The camera will then determine the shutter speed itself in order to reach the correct exposure. I just changed the metering modes. The pictures is centered on the tulip.
Spot metering

The camera chose a shutter speed of 1/30s (of curse I was using a tripod). With that really selective metering I obtain a really bright color of the flower. Maybe a little bit too bright.
Partial metering

The camera chose a shutter speed of 1/40s. It is a little bit less bright than the spot metering and I think I am almost right in the color rendering.
Center-weighted average metering

The camera chose a shutter speed of 1/160s. As the brightness of the light (background) is taken into account, my flower has got this not so useful dark-gray colour.
Evaluative metering

The camera chose a shutter speed of 1/200s. Even worse than the previous one but I could say closer to the black silhouette than the previous one (it always depends on the result you want to achieve).
And now just for the fun I used the spot metering with the measure button (the button with a star !!) not on the flower but on the lamp.

I have almost my black silhouette.. Okay the background is not so romantic… But I am sure that with a white balance correction the result would have been a little bit better.
I hope this examples could help you to understand the differences between the metering modes.
I just wrote a few sentences above about the measure button, the button with the star. This button is really, really, really useful. In Av and Tv mode you could use it like that: point at the subject you want bright, press the star button, then you’ve got a few seconds to recompose your pictures and focus. The exposure has been set up by the cam (really useful with back light conditions or for photographing details). In M mode it also helps, the only thing is that you have to set up your aperture, shutter speed and iso and then control your exposure with the star button.
A small conclusion and some tips:
– know your light-meter, choose a a metering mode, e.g. the basic one and play with the exposure in M mode with different configurations. Let the cursor be in the middle, then at +1 then at -1 and compare the results.
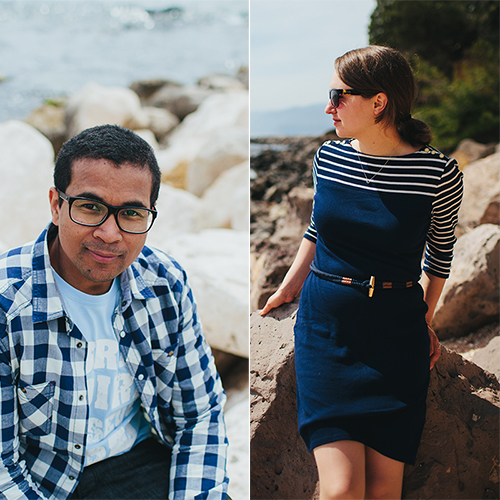
– A zone over exposed (too bright) as also a zone under exposed are zones where information is lost. That is why you have to think about what is important to you. I’ll explain this with these too pictures which are the same picture but one is the jpeg direct from the DSLR and the other the post-production picture after using Lightroom.

Back light situation with beautiful sunset on the beach. The two subjects are important but the beach and the sunset color too. That is why I had to find a small in between in order to not lose too much information.

Have fun with light.
