I must admit that once upon a time I was one on those people. I loved taking pictures so much that a good friend of mine offered me his old 350d. I was quite « proud » to eventually have a « big » gun and thought that was it… It was just wrong, it was just the beginning of a long journey. I learned a lot, am still learning and I want to share with you my small understanding of this world known as « Photography ».
Enough small talk for today. Let us start.
I called these post « Play with light » because I think that it is the essence of photography. Photography does literary means « write with light » or « paint with light ». You’re writing a story using as « ink » light and as « pen and book » your DSLR.
Let us talk about your « pen » and your « book ». Your DSLR is made basically of two parts : the body and the lens. With the lens you can decide how you want to see the external world, and the body, thanks the sensor, will record the picture.
The choice of the body and the lens really depends on the result you want to achieve but I will reserve that discussion for another post. I want to write in that very first post about the amount of light that you want to record. This amount of light is called « exposure« . The good thing with a DSLR is that you have a lot of possibilities to play with the exposure.
You will then define your exposure with 3 parameters: aperture, shutter speed, iso (in M mode you will have to define these 3 parameters).
– Aperture (of f-number) determines the size of the opening of your lens thanks a diaphragm. This will also determines your depth-of-field (what it sharp or not in your picture). A small aperture (like f2.8) corresponds to a big opening and gives you a short depth-of-field in order to detach your subject. A big aperture (like f11 or very big like f16 or f22) corresponds to a small opening and gives you a long depth-of-field to have at the limit case everything sharp on your picture. Of curse what I am saying does have its limits for instance when you are dealing with macro-photography or telephotography. With the Av-mode you will only have to define the aperture and the iso.
– Shutter speed determines the length of time you are exposing your sensor with light. With the shutter speed you can decide what kind of « motion » you want to record. You want to freeze it or smooth it. Long shutter time will require a tripod. With the Tv-mode you will only have to define the shutter speed and the iso.
– Iso determines the sensibility of your sensor. Do you remember the film with 100iso or 400iso? A high iso will corresponds to a high sensibility. Unfortunately a high iso delivers also a « lot » of noise which will then denature your pictures by adding e.g. a lot of « grain ».
I could also speak about the white balance now but I reserve it also for another post.
Now let us set up our 3 parameters in order to obtain a correct exposure. I use the word correct because the right exposure will depend on the effect that you want to reach. To judge your exposure you can use a light-meter. In your DSLR, the light-meter is that small cursor that that moves on a scale (most of the time « -2..-1..0..+1..+2 »). A correct exposure will be obtained when the cursor is in the middle (some tricks about the light-meter will follow in another post).
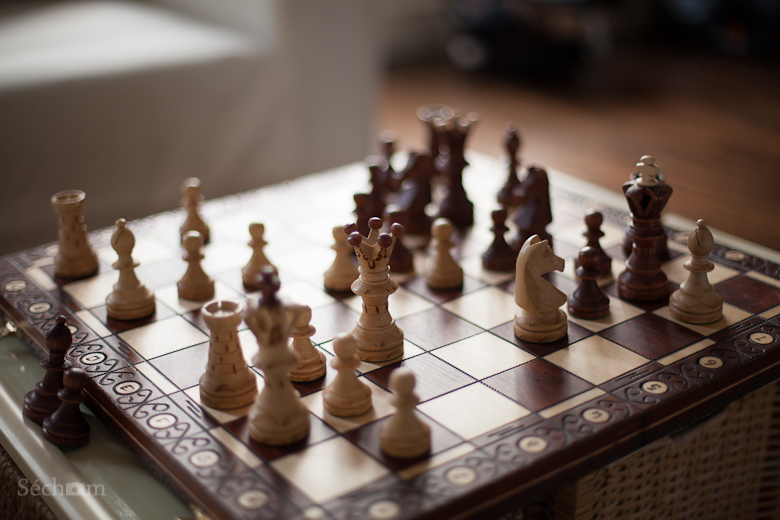
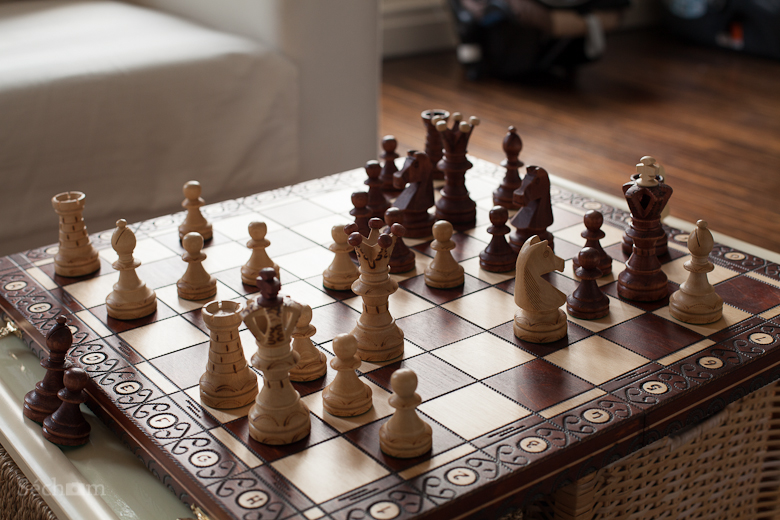
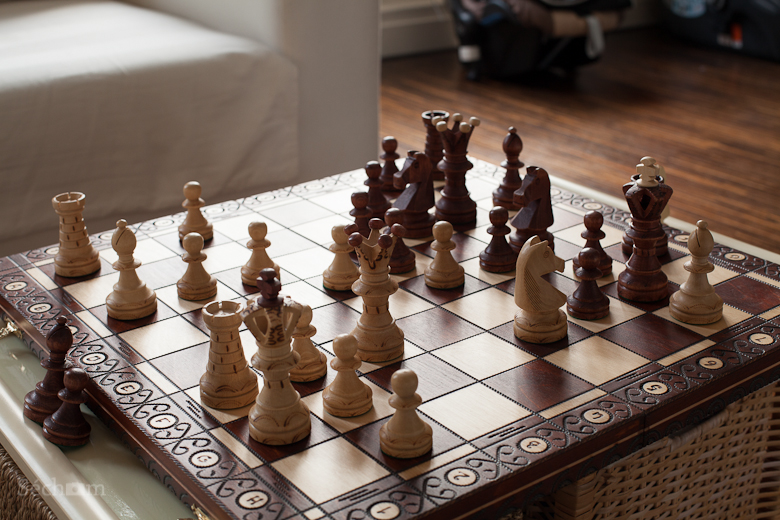
So, let us see some pictures. I tried in that pictures to let you see the effect of the aperture by trying to maintain a constant exposure. This is where the strange word of stops plays a role.
It is in fact simple : change for a next higher stop and you are dividing the amount of light by two. You can e.g. increase the aperture (which reduces the opening of the lens e.g. f2.8 -> f4.0), decrease the shutter speed (1/125 -> 1/250) or reduce the iso (400 iso -> 200 iso).
I set up the iso to 400. I changed then the aperture and adapted my shutter speed to reach the « correct » exposure.

– exposure = aperture + shutter speed + iso
– small aperture= detached subject e.g. f2.0
– small shutter time, freeze the subject e.g. 1/500s
– high iso = lot of noise, try to work with the smallest iso possible.
– without tripod is 1/60s a decent limit (without sensor stabilizer)
This post is not perfect but I hope it helped a bit. Please correct, comment, ask…